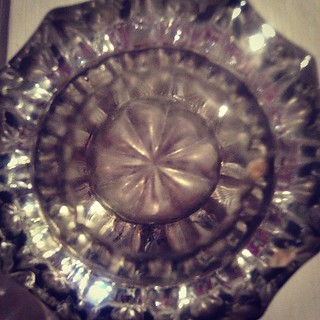
Can you guess what this is? I was inspired by one of my Instabuddies @adamsdrespling who takes close ups of objects. The point is to look at commonplace items in a different light. Who knew ordinary objects could look so extraordinary?! Have you taken a closer look at something today, that you would normally have walked past without a second glance? If you haven't, do it! It's so fun, and amazing!
By the way, the photo above is a close up of the one of our door knobs. How many of you guessed it? It looks like glass, but it's actually plastic. I felt like I was looking through a kaleidoscope!!
I had my heart set on making my fortune teller outfit, I even bought a caftan pattern from Etsy to make my outfit!! Then i chickened out of the pattern :(
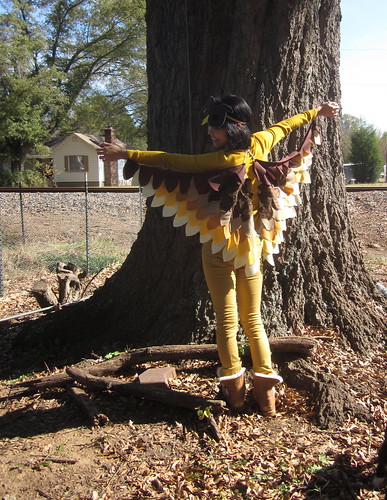
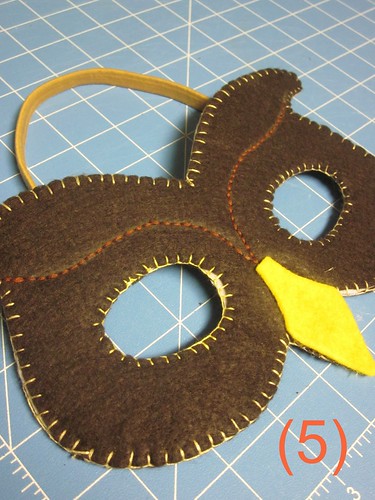
But then i found this easy-to-make Owl wings tutorial on Burda Style, and I figured I could easily make an owl mask. So that was decided!
To make the mask, you'll need:
2 pieces of brown felt
Scrap Yellow felt
1 piece of sturdy interfacing
Coordinating colors of embroidery floss
Embroidery needle
Hot glue gun
Head band
1. I drew a template of an owl mask, alternatively you can google owl mask templates,
or get one from the Martha Stewart website
2. Trace the template on the brown felt and on the interfacing
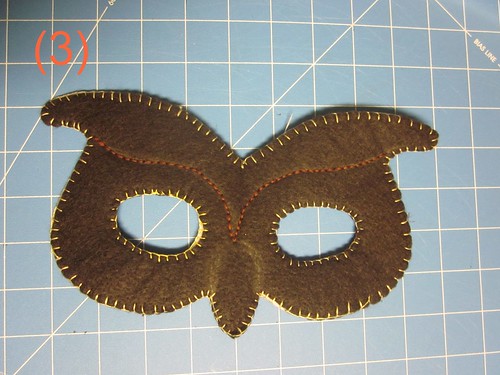
to cut out three owl mask shapes. Like so.
3. Sandwich the three layers so that the interfacing is in between the two pieces of brown felt. Pin the layers together.
Then thread your embroidery floss and blanket stitch the three layers together, all around the edges. I love using the blanket stitch because it a pretty stitch but it binds layers together very well! Functional and aesthetically pleasing.
I also used a running stitch to add a little outlining detail to the mask. You'll want to use a thicker needle and 6-count embroidery floss. Pushing the needle through 3 layers of felt and interfacing and be quite a challenge!
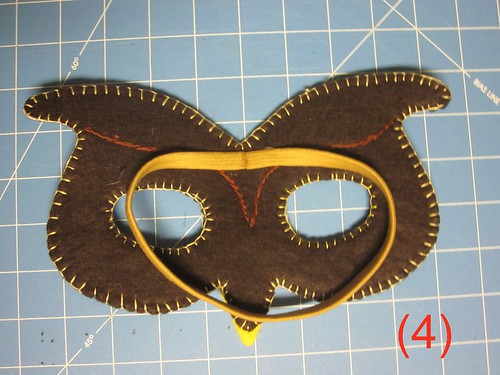
4. Attach the head band to the mask using a hot glue gun.
Press and hold head band in place until the glue dries.
Now, where you place your head band is a matter of personal preference.
I attached my band in the middle of the mask above the eye holes because after playing around with different placements, this was most comfortable for me.
You should experiment too, before permanently attaching the band to the mask.
5. Cut out a diamond shaped beak from the yellow felt. Leave one of the edges slightly rounded or plateaued. Hot glue this piece onto the bottom of the mask where the beak goes. Ta-daaa!! And you're done!
Now go be a HOOT, and take someone under your wing! *guffaws*
(Insert your own owl joke here for laughs)
And I'll be the gypsy fortune teller next year!
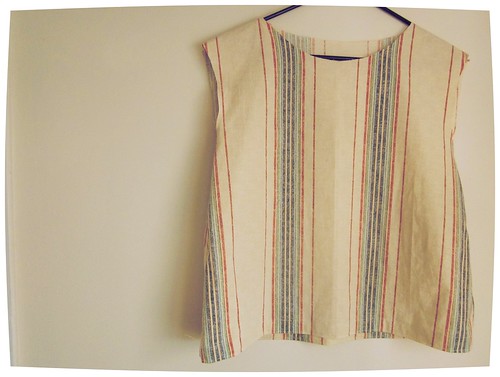
So i bought a set of two striped pillow cases from Goodwill one day, because I was going to attempt the Little Dresses for Africa charity, after procrastinating for such a long time. I first read it on Nana Glo's blog, Glo Sews and it seemed like such a simple project to attempt.
When i finally sat myself down to make the dress, i realized i didn't get any bias tape and I so wasn't in a mood to make them...
So I did a little free hand reconstruction on the pillow case to make myself a top instead!
I used a pattern for a ladies apron to cut out the neckline and armholes. When I cut the pieces out, they looked pretty promising as a mini dress, especially when I loved the stripes so!
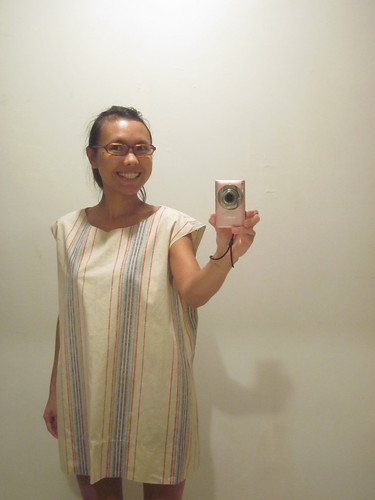
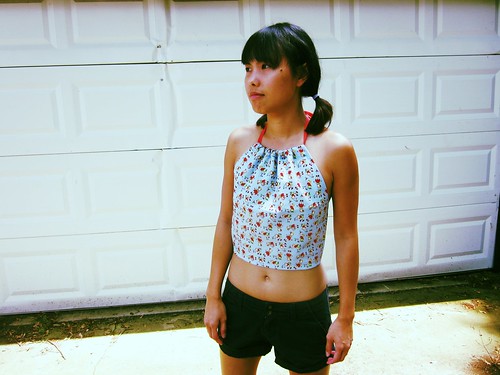
Alas, when i sewed the shoulder and side seams together, and tentatively tried it on, I looked like I was wearing a feed sack! I was so amused I had to take a picture of myself in it!
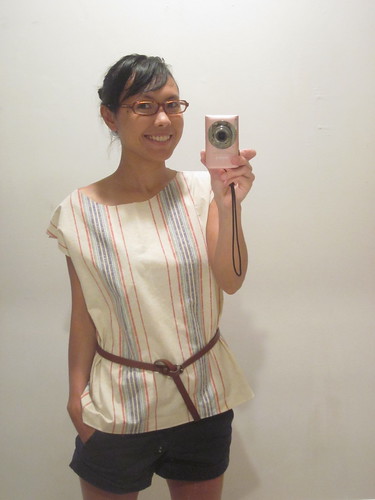
So i took in some fabric at the armholes (too big!) and sewed three darts on the back and trimmed off the bottom to make it a long top, instead of a short dress. Much more presentable.
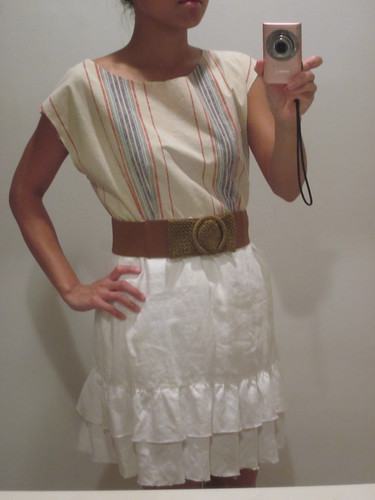
Here is another way I would somehow wear it.
And so, I present yet another one of my ghetto snip-and-sew RTW piece.
And oh yes! Only four more days left in the Spreading Good Cheer Giveaway for a turquoise necklace! So if you haven't checked it out, do so now! You might just be the lucky winner!
I made a couple of these as gifts, but I had to try them on myself! Not having much of a chest meant they fit me perfectly. It's a pity I didn't get to take pictures of the two little cutie pies I gave these tops to. But i gifted a third one to J's cousin and she looks so adorable!!
Does this count as trying out dress patterns? (even though it's the super easy ones?) If so, another off the bucket list please!
Alright, i'll try an actual DRESS pattern one day!
Now I told you I bought a bunch of patterns off Etsy!
The J-man has been waiting for me to make him something. He complains that I make gifts for everyone and forgets him. So he requested for me to make him something with the Chicago Bears emblem on it. Because he loves to cook, i decided to make him an apron.
We discussed the details, and he decided he wanted it simple, with just the signature "C" with orange pockets in the front. And then we took a trip to Hancock Fabrics together for him to pick out his blue and orange fabrics. This was exciting for me because I got the chance to show him around my crafting 'turf'. He could never understand why I loved to make trips to the fabric store, but after his own experience, he was pretty impressed. :)
Once the fabrics were chosen, he left me to work, but i had to occasionally bother him with fittings.
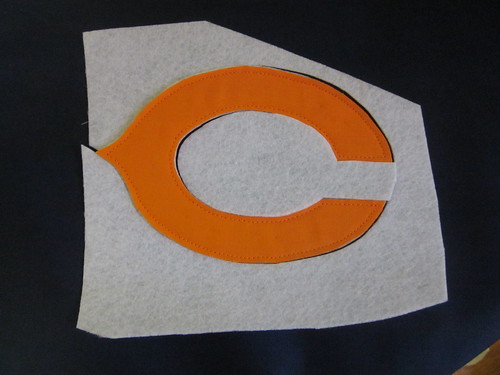
Now i know i'm probably infringing copyrights. I got the letter "C" printed off the internet for a template. BUT i figured this is for personal use, and it's not like they have Bears' aprons for sale. So i traced the letter onto the orange fabric and some sturdy interfacing, edgestitched the layers together and zigzag stitched the letter to the apron. Really proud of this because it looks real profesh!
I doubled the layers of the apron body to hide the applique stitches on the back. And for the first time, i find out about facings. So yes, i think i know ALL about interfacings. But facings? What?
According to Wikipedia, facing is fabric applied to a garment edge, on the inside.
I had to google and youtube all about sewing facings! Thank gawd for the internet. You can learn almost anything online these days. This site was very useful to help me visualize the instructions.
And this video is AWESOME! It explains the use of facings, how to pick the right facings, and how to sew a facing from start to finish!!!
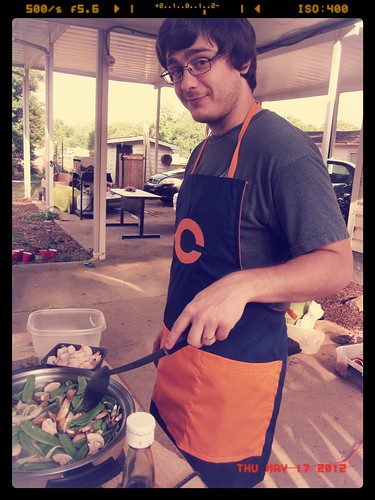
So yes, the apron is complete with bright orange facings on the inside, down the sides.
Here he is, testing out the end product with some outdoor stir frying. But I think he loves it. :)
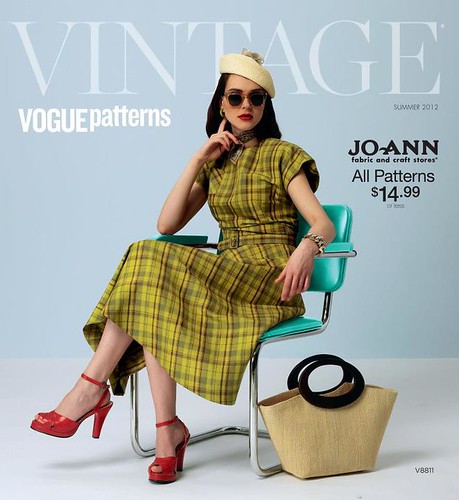
No I didn't buy this one. I'd just seen this on JoAnn's FB page and thought I'd share.
*gasp*
"Vintage Vogue patterns now in Jo-Ann stores with new designer Lialia by Julia Alarcon, two new summer dresses, designs from Koos Van Der Akker, and designs from Chado Ralph Rucci and Issey Miyake."
But just look at the price! $15.00 for a pattern! Would you pay $15 for a dress pattern?
Only available in stores though, not online (yet).
So I gathered up courage to attempt a paper pattern for an envelope clutch just to see how to improve on my own take-a-wild-stab version.
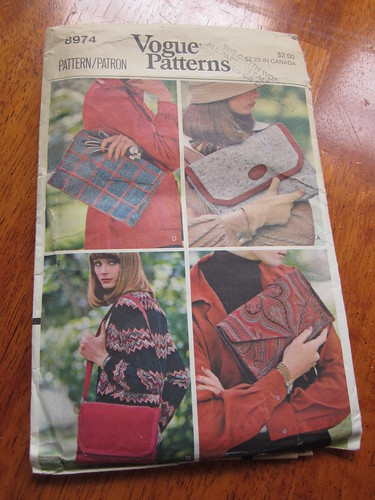
I bought this pattern off Etsy and attempted this simplest version of the 4 designs.
*takes a deep breath*
Here goes nothing:
This is what I did different from my usual non-pattern attempts:
1) I added a dart to the base, which I had a feeling was to give the base a foldline so you can flatten it? Although, I'm not sure if my dart was done right.
2) I topstitched ALL the edges to give clutch a sturdier look and feel!
3) The flap was an external piece of fabric that was sewn to the body of the bag. My previous clutches were made from just one piece of fabric, folded into 3 sections (really easy!)
4) I added side panels to give depth to the clutch
As a result...
Ta-daaaa!
A free-standing sturdy looking piece of work!
If I were any awesome-r, I could have made the stripes on the fabric align. But this was a trial run, and I'm so in love with the Thai silk fabric that I'm going to have to keep it for myself!
It took me awhile to understand the instructions in the pattern and to familiarise myself with the symbols on the illustrations, but now I've gained a little more confidence to maybe attempt the other 3 designs and definitely hoard MORE patterns!
Any words of advice from seasoned pattern users?
And don't forget the ElephantisLove giveaway ends tonight 11:59PM EST! I will pick a winner via random.org