Saturday, October 27, 2012

News from the garden: Fall Surprises!


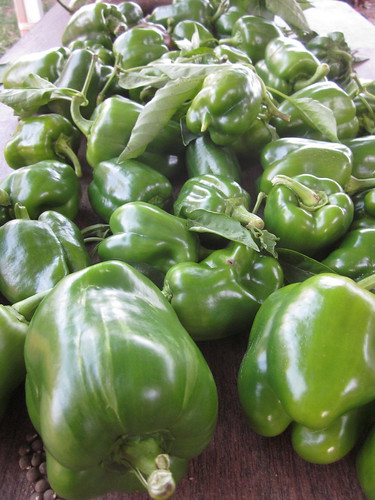
Here's the last round of harvest from the summer crop before we cleared it for the fall garden.

IMG_7603

IMG_7604


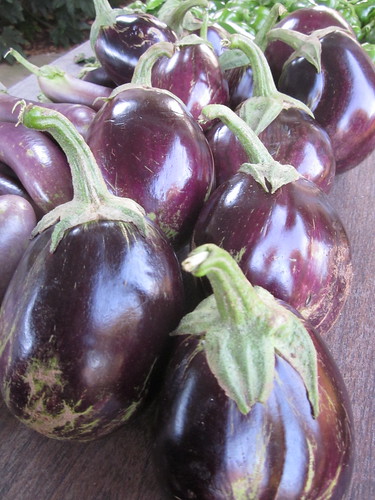
Did I hear someone say baba ghanoush???

Via


Here is another surprise. We had strewn some marigold seeds last summer. Nothing ever came up, until this spring. And then it was only a wee flower struggling to survive amongst the other towering plants. In a blink of an eye, that lone marigold grew and blossomed into this:


IMG_7712


Isn't Mother Nature amazing?
We now have daikon, arugula, bak choy and some other veggies in our fall crop.
What are you harvesting this season?


Thursday, October 25, 2012

Day Trip : Carolina Renaissance Festival!

IMG_7704


Huzzah!!

The Renaissance Festival is back! Lots of tankards of mead and turkey legs to be had. This is my first visit and I LOVED IT! There were lots of visitors who actually dressed up in their Renaissance costumes for the fair! If only I'd known!! Next year I want to dress up too!


IMG_7670

Do you believe in fairies? I just spotted one!


IMG_7655

My favorite shop - the craftsman makes beautiful one-of-a-kind dream catchers, wooden kaleidoscopes and other glass trinkets!! I had my eye set on a Dark-Side-of-the-Moon prism dreamcatcher but it was out of my budget... oh well. I hope some lucky guy picks it out!

There are lots of craft stores, activities, and performances going on at all times. Go to their web page to check out their list of events.


Weekends only, 10:30am-5pm, now till Nov 18th, 2012!
16445 Poplar Tent Road, Huntersville, NC 28078

Friday, October 19, 2012

Celebrations : Halloween Kiddy Cuteness!

Is it me or is Halloween just around the corner??

I just received an invite to a Halloween party and am scrambling to think up a costume right this minute. I had a few ideas months ago, but the procrastinator in me said "You know you'll get it done in a week, why worry now?"

Ok. It's time to start panicking... the party is in ONE week.


While doing research, the procrastinator got sidetracked (yet again).

And this is what she found...


via


via


via


via
I love this last series. The kids in the pictures have just the perfect expressions too. Frodo and Tintin are my favorites! So simple yet so clever!!

How are you dressing your kiddos this year?

Wednesday, October 17, 2012

Crafting: DIY Tissue Paper Pomanders


IMG_7467

Alright here's the low-down on the tissue paper pomanders : they are super easy to make, but they are very time consuming. Especially if you are making them in large quantities, or making a huge-ass pomander.


Materials:

An 8" or 10" styrofoam ball
White tissue paper
Gauge wire
Acrylic paint
Spray bottle
Scissors
Wire cutter
Hot Glue gun and glue sticks


First, get ready to make a gazillion tissue paper flowers before we even try to make a pomander. So:

IMG_7427

(1) You will need tons of tissue paper cut into rectangles measuring 5" by 10". Each flower is made up of 4 layers of 5"x10" rectangles. I stack 4 pieces of tissue paper at once before cutting them into the rectangles.

(2) Then you need to accordion fold each stack of 4 rectangles. Each fold measures about
1/2" - 5/8" depending on how you like your flowers.
Experiment with a few to help you decide!


(3) I use clothes pegs to keep my accordion folded stacks neat and tidy while I continue to fold more rectangles.


IMG_7578

(4) Cut a piece of 6" gauge wire, wrap it around the middle of the folded tissue paper, before twisting the two ends together, like in the picture above.

(5) Rounding the edges of both sides of the tissue paper will give your flower a softer look.


IMG_7579IMG_7583

(6) Carefully peel the layers away from the wire, towards the middle, one layer at a time.

(7) When all four layers are peeled and fluffed up, trim the gauge wire to about 1.5" - 2" long. You really don't need a very long stem!


I used white tissue paper because I couldn't find pink / coral tissue paper in large quantities. But the good thing about using white tissue is that you can virtually make ANY color pomanders to suit your needs.


IMG_7586

(8) I mixed some pink acrylic paints with water in a spray bottle, shake to mix well, then proceeded to spray ALL my flowers individually. I kept my flowers in the bathroom, next to a space heater so they can dry more quickly!


When you have all your flowers ready, you can start to make your pomanders. I bought my 8" and 10" styrofoam balls from Michaels (a craft store). Here, a glue gun will be very useful!

For demo purposes, I have used a spare tiny styrofoam ball for show because I forgot to take pictures while making the real thing.

IMG_7588IMG_7590

(9) To make the ribbon loop for hanging the pomander, cut another piece of wire about 6" again. Cut your desired length of ribbon, knot in the middle to the wire. Again, trim the wire to about 1.5"-2".

(10) Push the wire into the styrofoam ball and hot glue around the wire (and knot, if desired)


Now you can start sticking the tissue flowers into the styrofoam ball. An 8" ball will take about 40-45 flowers, and a 10" ball takes 60-65 flowers. For additional security, with every flower i push into the ball, i hot glue around the base to make sure the flower stays.

IMG_7450


Here are the results of the blood, sweat and tears! Ta-daaa!!! It took me a week to make four 8" pomanders and two 10" pomanders. Hope this was useful!


Monday, October 15, 2012

Celebrations: Wedding at the Alexander Homestead

Congratulations to my brother-and-sister-in-law!!!

J's brother got married over the weekend. And the reason I went MIA was because I was busy making pomanders for their wedding!!

As usual, I waited till the very last minute (nobody but myself to blame!). But i have also reconciled with the fact that although a procrastinator, I get the job done! And pretty darn well!!

So yes, I did finish my wedding gift to the couple! Here are some pictures of the beautiful wedding at the Alexander Homestead in Charlotte!

IMG_7469

Note the pretty pomanders that flank the sides ! *lol*

IMG_7472

The cosy barn where we had the reception, and all that dancing!

IMG_7475

R for Russell!
Cupcakes galore!!


IMG_7503

Exchanging vows that are FOR-EH-VUH! Love you both!


Will share with you the (tedious) process of pomander making in the next post!


Tuesday, October 2, 2012

Puppy love : Dog-sitting for a week

IMG_7338

J's parents are out of town so we get to babysit little Daisy for a week. The happiest kid in town has to be Scuffy, because he now gets a playmate to play with.

IMG_7344

Scuffy completely adores Daisy. He follows her wherever she goes. He lets her have his treats and wants her to play all the time. Daisy is, however, more chill. She likes to have her peace and is annoyed when Scuffy gets into his playful moods.

But it has been five days, and Daisy has begun to accept Scuffy's presence. They're so cute together. Although Daisy is two years of age, Scuffy is heavier, and almost bigger in size.

IMG_7414

Besties forever!
Related Posts Plugin for WordPress, Blogger...