

Alright here's the low-down on the tissue paper pomanders : they are super easy to make, but they are very time consuming. Especially if you are making them in large quantities, or making a huge-ass pomander.
Materials:
An 8" or 10" styrofoam ball
White tissue paper
Gauge wire
Acrylic paint
Spray bottle
Scissors
Wire cutter
Hot Glue gun and glue sticks
First, get ready to make a gazillion tissue paper flowers before we even try to make a pomander. So:
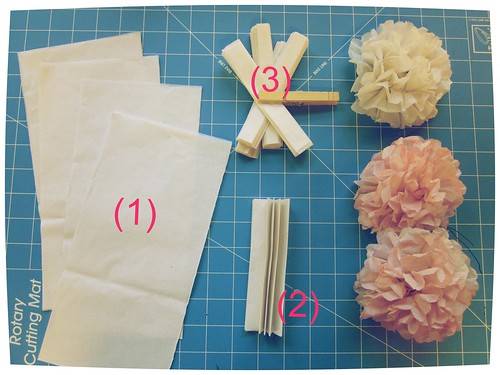
(1) You will need tons of tissue paper cut into rectangles measuring 5" by 10". Each flower is made up of 4 layers of 5"x10" rectangles. I stack 4 pieces of tissue paper at once before cutting them into the rectangles.
(2) Then you need to accordion fold each stack of 4 rectangles. Each fold measures about
1/2" - 5/8" depending on how you like your flowers.
Experiment with a few to help you decide!
(3) I use clothes pegs to keep my accordion folded stacks neat and tidy while I continue to fold more rectangles.
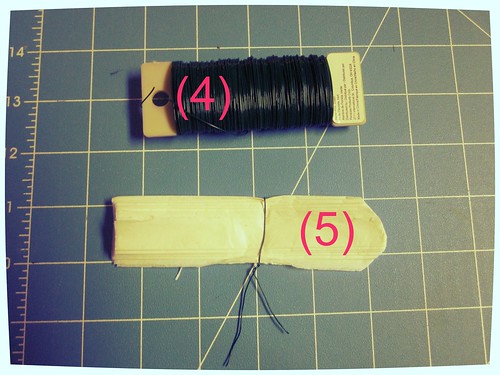
(4) Cut a piece of 6" gauge wire, wrap it around the middle of the folded tissue paper, before twisting the two ends together, like in the picture above.
(5) Rounding the edges of both sides of the tissue paper will give your flower a softer look.

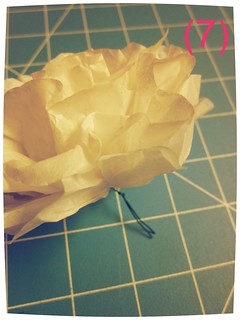
(6) Carefully peel the layers away from the wire, towards the middle, one layer at a time.
(7) When all four layers are peeled and fluffed up, trim the gauge wire to about 1.5" - 2" long. You really don't need a very long stem!
I used white tissue paper because I couldn't find pink / coral tissue paper in large quantities. But the good thing about using white tissue is that you can virtually make ANY color pomanders to suit your needs.
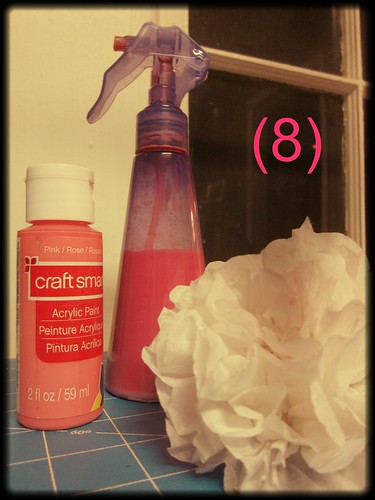
(8) I mixed some pink acrylic paints with water in a spray bottle, shake to mix well, then proceeded to spray ALL my flowers individually. I kept my flowers in the bathroom, next to a space heater so they can dry more quickly!
When you have all your flowers ready, you can start to make your pomanders. I bought my 8" and 10" styrofoam balls from Michaels (a craft store). Here, a glue gun will be very useful!
For demo purposes, I have used a spare tiny styrofoam ball for show because I forgot to take pictures while making the real thing.
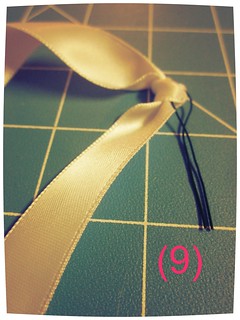

(9) To make the ribbon loop for hanging the pomander, cut another piece of wire about 6" again. Cut your desired length of ribbon, knot in the middle to the wire. Again, trim the wire to about 1.5"-2".
(10) Push the wire into the styrofoam ball and hot glue around the wire (and knot, if desired)
Now you can start sticking the tissue flowers into the styrofoam ball. An 8" ball will take about 40-45 flowers, and a 10" ball takes 60-65 flowers. For additional security, with every flower i push into the ball, i hot glue around the base to make sure the flower stays.
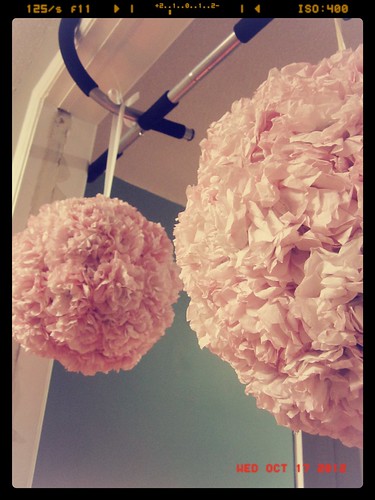
Here are the results of the blood, sweat and tears! Ta-daaa!!! It took me a week to make four 8" pomanders and two 10" pomanders. Hope this was useful!
Wow they turned out amazing! I can't wait to try to make one myself.
ReplyDeleteThose look super cool but sound like a TON of work. Awesome job!
ReplyDeleteWow these are so fun! I haven't been crafting enough lately, and these look like they would make the perfect decorations for the holidays!
ReplyDeleteGreat job! Maybe it's time-consuming, the result is amazing!!!
ReplyDelete