
Lovely Danielle of Tongue Tied in Awe did a lovely birthday giveaway of a chance for readers to sponsor her page for free! (so much giveaway love in the blogosphere, i likey!)
She has kindly given me a spot on her page to advertise my page, but first i had to make a button she could put on her page. I was stumped and had no idea where to start. Making my Etsy banner was one major roadblock. My images always came out blurry. Now i had to resize things to make an even smaller button?
So after a day or five of fiddling around on my Powerpoint and on Flickr, I came up with a simple and foolproof method to making blog buttons. And now i'd like to share it with you. However, if i'm doing this in a tedious manner and you have 101 other shortcuts, please share some tips! I could use some help and become a little more blog savvy! :)
I like my blog buttons simple. So if you're not into anything fancy, here goes nothing...
#1
I google the internet for an image of a plain background. That will act as the base color of my buttons. Or you could simply open up Powerpoint (PP) and create a shape and add a color to your liking.
For the sake of visual continuity, i have chosen the same linen background as my blog. I save this image on my desktop.
#2
I figure out the size requirements of the button I will be making.
This is what I think is going on. Most people will ask for a size in pixels. When I opened up PP to create my button size, I found out that it measures images in height and width instead of pixels. So i went to this website Image Size Calculator/ Convertor to convert my pixels into height and width (in inches).
My button has to be 184 x 70 pixels. When i plug in the numbers into the calculator, it gives me
#3
I open up PP and insert picture (my linen background) on a new document. Then i double click the image to format it. On the left column, you will see the option 'Size'. Click on that.
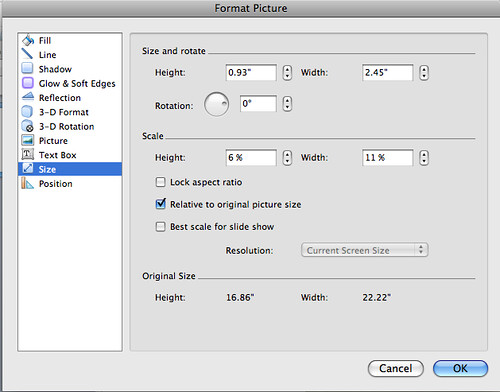
Then plug in the numbers you have obtained from the calculator/convertor, in this case 0.93" (height) and 2.45" (width). Click OK and your image would have be resized to the required measurements. Right click and save this image on your desktop.
#4
Now for the fun bit : Designing your button.
I uploaded my button image onto Flickr. Then I click on 'Actions' and scroll down to the option 'Edit photo in Picnik' (third one from bottom)
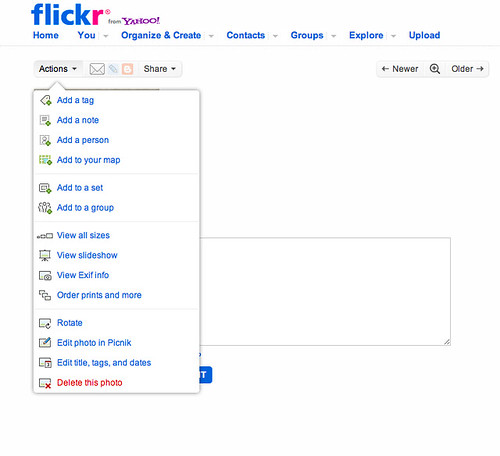
You will be taken to this page with tabs at the top of the page. Play around with them! To add text, I click on 'Text' tab. For images, I choose 'Stickers'. There are so many options to play around with you can make a million different buttons.
And guess what? These are the simplest buttons you can make. If you are a premium Flickr member and any more tech-savvy than i am, you could probably churn out tons of beautiful buttons in a flash.
P.S. I use a Mac, so the instructions above may differ for non-Mac users. but I don't really think so.
In my excitement, I made a few: which one do you like?


cute, i like the bottom right
ReplyDelete;)
xoxo
Ahhh this is so easy! I'm not very Photoshop-savvy, so this makes me feel better!
ReplyDeleteawww they look so cute :) my hubs helped me make mine .
ReplyDeleteI love the one with the hearts!! Great tutorial for those who don't have Photoshop or any other design programs.
ReplyDeleteI like....well I like all of them, but my favorite is the bottom left.
ReplyDeleteyour buttons look fantastic!!! a great tutorial, with a super adorable result :) thanks for posting this!
ReplyDelete