Showing posts with label christmas. Show all posts

Tuesday, December 25, 2012

Celebrations : Merry Christmas!


Ho! Ho! Ho!
Scuffy wishes one and all a Merry Christmas!
This is his first ever, so he got one of his gifts early!


Our gifts are all wrapped up and ready to go!! 
We're spending Christmas at J's parents this year, on the horse ranch. 
We hope everyone has a wonderful time this special season, 
and hope to see your posts soon!


May you have a blessed Christmas with your loved ones, 
and a great 2013 ahead!!

Sunday, December 23, 2012

Crafting : Tis the season to be gifting!


Made a whole bunch of Christmas coasters for the co-workers.


Some more home-made ornaments for the tree


My intention was to embroider Christmas cards this year. But I only got done with one. 
And that was a birthday card for my pug-loving friend. Next year I'll start early!


2 more days to Christmas!!


Tuesday, December 18, 2012

Recipes : Chocolate Fudge for Christmas!


One week to Christmas!!!

I love and hate this holiday season because there's too much yummy goodness around to resist!

Here's one easy recipe I attempted for a Christmas party.

Caution: Super easy recipe and super addictive!

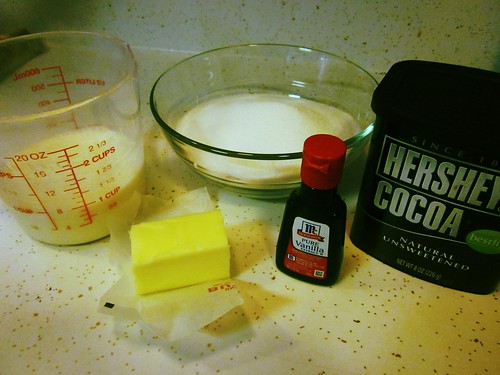
IMG_8145

Ingredients

2 cups white sugar
1 cup milk
1/2 cup cocoa
4 tablespoons butter
1 teaspoon vanilla extract


Grease a 8x8 inch square baking pan and set aside.

Mix the milk, sugar and cocoa in a saucepan.

Keep stirring and bring the mixture to a boil.

When it starts boiling, stop stirring, and reduce heat to a simmer.

Place a candy thermometer in the mixture and cook until 238F. My candy thermometer has a marking for 'Soft Candy' at 238F. So I guess that's what you're aiming for.

Remove from heat and stir in vanilla extract and butter. Beat the mixture until the butter has melted and thoroughly mixed in. You don't want to stir it too long, because then the mixture will cool and harden.

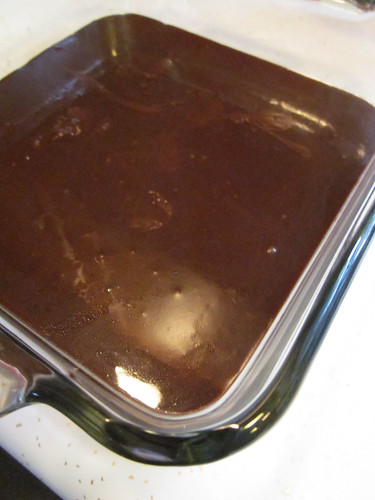
IMG_8153

Pour the mixture into your greased baking pan and let it cool.

When it has hardened, cut into tiny squares to serve!!


Saturday, December 15, 2012

Crafting : Martha Stewart's Christmas Stockings

Martha Stewart sent me an email. Oh-kay. Martha Stewart DOT com sent me an email, with a tutorial on how to make Christmas stockings. And just in time too, because this is Scuffy's first Christmas, I wanted to make stockings for our little Russell family.


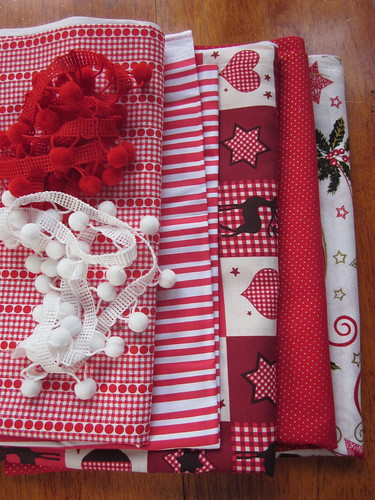
This is the tutorial for her Christmas stockings. But I decided that I didn't want to make mine out of felt, so I hopped over to the craft store to get some pretty Christmas fabric and trimmings, and they were on 50% sale!!

IMG_8139

I also added batting to my stockings, just because i like soft squishy ones.

And some pom-pom trimming to make it fun!

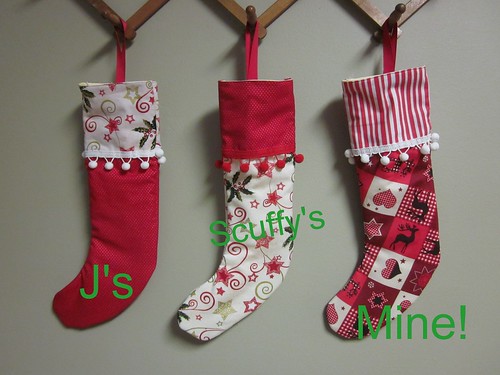
IMG_8142

Ok, so the stockings didn't turn out to be too spacious, i think we can only stuff it with candy canes and perhaps gift cards. But, they look pretty neat on my hat rack!

Yay for quick and easy Christmas crafts!

Friday, December 7, 2012

Crafting : Christmas tree Felt Ornaments

Holy guacamole! It's December already!!

I haven't been wasting any time, and have been busy crafting gifts for this holiday season, although I have a feeling I'm about to run out of steam soon! For today, I'll share my first craft of December - Christmas tree ornaments for the 3 adorable kids I help babysit.

I love felt crafts. Here is an easy one you can attempt, if you're looking for quick and easy gifts to make.


IMG_8062

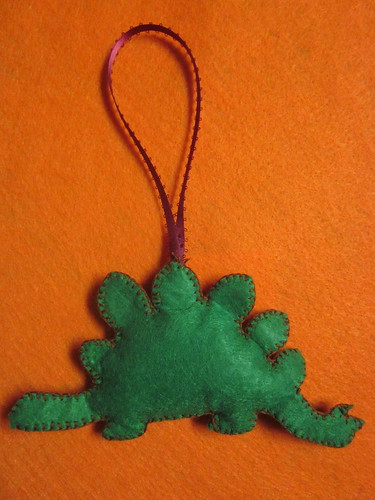
1. Make a template out of cardstock. I got mine off the internet - santa, T-rex, and owl. You can also draw your own!

2. Trace the template onto the different colored felt pieces and cut them out.

(Now I know not all the templates I provided are templates with individual pieces. With the Santa picture, I used it as a guide to draw my own template freehand.)

3. Arrange the felt pieces in a satisfactory manner, and decide how you want to attach them. I used a combination of stitching and hot glue.


IMG_8064

Take the T-rex for example. It is only made of 2 main pieces, so I decided to blanket stitch all around. Starting in the middle at the top, I attached a ribbon (for hanging on the tree) to the felt using needle and thread, and started my blanket stitching from there.


For the Santa, I used running stitches for his eyes and mouth, before blanket stitching his beard together. This way you can hide your stitches on the inside! Then I used the glue gun to hot glue his nose to his face, and his face to his beard. Use your own discretion when putting the pieces together.


4. Finally, if you like, you can add a little stuffing to give your ornaments a 3D effect!

IMG_8069

IMG_8070IMG_8071


These ones are ready to be tossed into their goody bags! I also added fun stuff like bubbles, activity/story books, kiddy snacks and stickers! Can't wait to watch them hang their ornaments on their tree!

I'm going to make some more for our Christmas tree (when I get a break)! Meanwhile, have fun making yours!


Oh and I'm doing a button swap with Melissa Ashley of the 25th Hour. Go check out her page if you're interested in doing a button swap too!


Linking up here too! Come join the crafty fun!


Sunday, November 11, 2012

Crafting : Travel map garland


Via

No, that's not the garland I made for my sister's wedding, although it's real pretty!

Mine's even simpler -- it can be done in 1-2-3 easy steps!

You'll need:

Old maps
Ribbon / twine
Pen-knife (Exacto knife)


IMG_7046

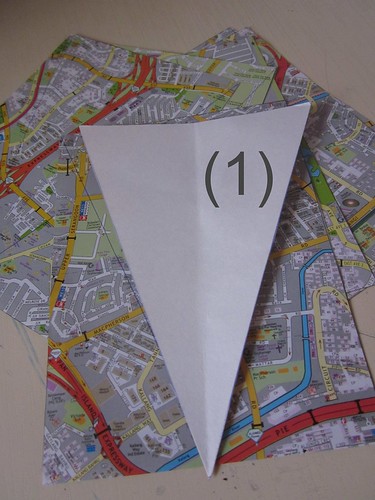
(1) Create a template of the shape you want your garland to be. I made triangles, but you can just as easily make hearts, or any other shape you fancy.
Trace template onto a map, and cut them out. I couldn't get a hold of older vintage looking maps, so I used an old street directory my dad wasn't using.


IMG_7049

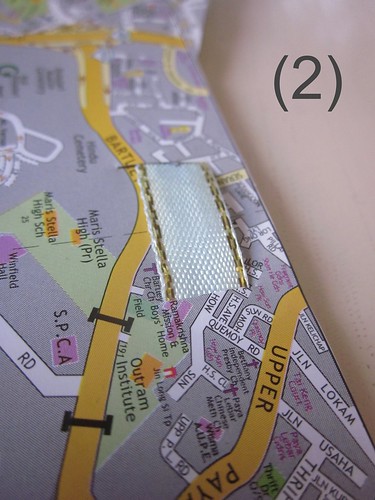
(2) About one inch from the base of the triangle, I used a pen-knife and made two tiny slits about an inch apart.
This is for you to thread your ribbon/twine through to string the triangles together.


IMG_7054

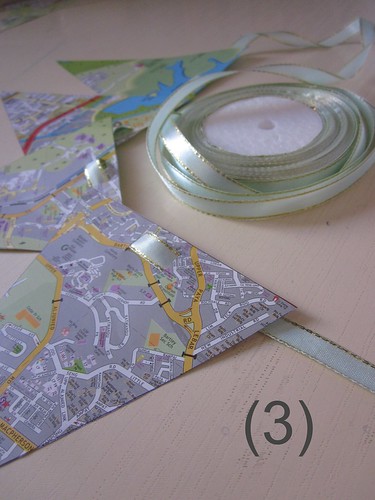
(3) Thread all your shapes together, and get ready to hang your garland up!


With all the holidays around the corner, this is such a simple but great way of sprucing up your home for the festive season! You could use wrapping paper in place of the maps, and cut out some simple Christmas tree / candy cane shapes and string them up! Q.E.D!


Tuesday, December 27, 2011

Christmas Traditions: Reel time!!!


Going to the movies seems like a pretty big Christmas tradition here. Everyone has a list of Christmas movies to watch whether new or old. I was driving to work a few days before Christmas and the radio DJ was talking about a top 10 all-time must-watch Christmas movies, half of which I've never heard, and almost all I've never seen!

So, while spending a lazy turkey-coma-Sunday at the in-laws, I decided i must at least watch ONE of them. Starting with A Christmas Story. Not that I would have missed it, it was playing ALL DAY on Sunday.

The movie came out in 1983 but set in the 1940s, a little boy named Ralphie tries to convince his parents to get him a Red Ryder BB gun for Christmas. It was such a feel-good, funny and heartwarming tale that made me go all gooey inside. But there were also hilarious moments like when Ralphie's friend's tongue got stuck to the frozen lamp post ("I triple DOG-DARE YOU!") or when Ralphie turns to the camera to give the audience a cheeky wink. I think the best part about the movie was the off-screen narration!


Then i watched Elf, starring Will Ferrell and Zooey Deschanel! Two actors i really like! Now THAT makes for a really good movie! Doesn't she look so different with blonde hair?

So two movies off my checklist. Next up -- National Lampoon's Christmas Vacation. And I'm saving that for a movie night with the J-man, while eating our leftover popcorn balls from the weekend.

Hope you had a great Christmas! What are your Christmas traditions and do you have a Christmas movie to recommend?


Friday, December 23, 2011

'Tis the season...


Merry Christmas dear friends!

Hope you're all having a wonderful time with your loved ones! We're going up to the mountains to visit J's grandparents, have tons of homecooked food, and sit around the bonfire. I hope it gets colder (I can't believe I'm actually saying this), but 60 deg F is NOT feeling like Christmas.
We had SNOW last year. Today, I was prancing around in a short dress and leggings.

Definitely not feeling like Christmas.


IMG_4629


I had been busy the last coupla' days sitting around and making accessories for my girlfriends for Christmas.

On my trip back to Singapore, I bought a yo-yo maker and OMG i couldn't stop making them. They're SO EASY to make! and such a great fabric stash buster idea.

If you have no idea what a yo-yo maker is, click here, or get one and have yourself hours of fun!!!

I actually brought my hoarded stash collection of buttons from Singapore and was glad they were put into good use! I made some hair ties, brooches and head bands.

IMG_4631


This one is my favorite. I made it for my friend's daughter and I can totally picture her wearing a white dress with that on her head! Best of all, she's a little redhead so it'll totally stand out!

Sorry, not the best pictures, i know. But i did get many appreciative oohs and aahs over the accessories! Yay!

Have a wonderful Christmas and Happy Holidays!!!


Monday, December 19, 2011

Crafting: DIY Christmas wreath tutorial


Here is the simplest wreath you can ever make:

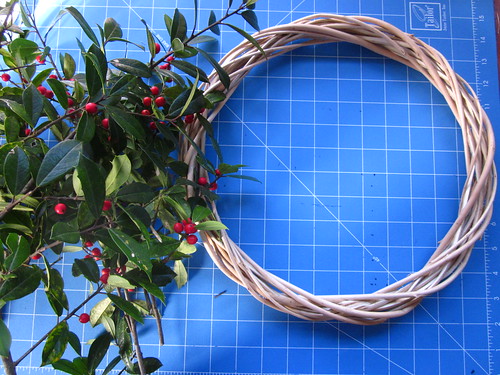
You need:

IMG_4584

1 wreath garland ($1)

IMG_4451
1 wreath frame ($1)
Cut branches from tree in backyard

Total Cost : $2.00
Time needed: 10mins

Wrap garland around wreath frame.
Tuck ends of garland into wrapped garland to secure.
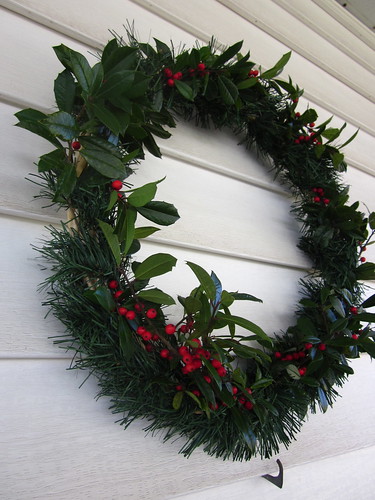
Arrange branches of leaves and berries around the wreath.

IMG_4582

Ready to hang!

Sunday, December 18, 2011

Crafting: DIY Christmas tree tutorial

Just because we didn't get a Christmas tree for the house...


IMG_4562

doesn't mean I can't have one!

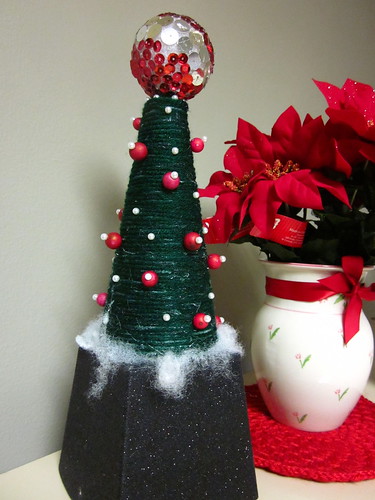
So...I made my own DIY tree!

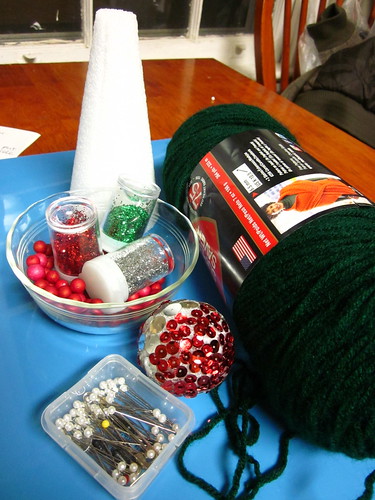
All you need:

1 styrofoam cone
1 styrofoam ball (or whatever tree top ornament you like)
Yarn (whatever color you desire. I stuck to traditional green)
Pearl studded pins
Styrofoam filler balls for ornaments on tree
Glitter
Sequins
Tree base (i used a recycled cardboard bucket turned upside down)
Cotton wool
Glue gun

To make the tree, I used the glue gun to affix yarn to styrofoam cone. Wind it from the base to the top. Set aside to dry.

Then i started making the tree top ornament, a disco ball sorta vibe. I glued sequins (one by one) all around the styrofoam ball, burning my finger tips countless times, so please be careful! You may use a pair of tweezers to help you in this process.

If you want to cover up the excess spaces in between the sequins, brush elmer's glue all over the ball (after the hot glue has cooled and hardened) and roll ball around in glitter. I didn't have any liquid glue on hand so i omitted this step.

Hot glue the ornament to the top of the tree.

Stick pearl pins and styrofoam balls randomly around tree.

Hot glue tree to base. Then glue cotton wool around base of tree to hide the tail end of yarn.

IMG_4563

Ta-daa!!!
Related Posts Plugin for WordPress, Blogger...