Showing posts with label baking. Show all posts

Sunday, February 10, 2013

Happy Chinese New Year (of the Snake)


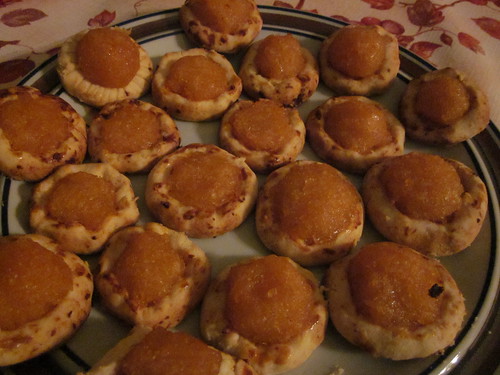
I have been busy spring cleaning the house for the new year. And also baking pineapple tart goodies because that's about all the Chinese New Year festivities I can get here in Charlotte. The picture above shows my mother's masterpiece. The food I miss most during Chinese New Year food is her pineapple tarts. She would stand by the stove, stirring and boiling the pineapple pulp for hours. Now she buys the ready made jam from the store. Still, they taste just as fantastic. And somehow she always manages to get the pastry just right, so it looks glazed and pretty, but instantly crumbles and melts in your mouth.

She is my inspiration to make picture perfect yummy-licious tarts. I'm getting the hang of it. I need to get those pretty cookie molds to press my dough into. Right now I cut my dough with round cookie cutters and they look like this.


I'm just happy they taste pretty good. I'll work on the presentation bit next year!

If you celebrate Chinese New Year, GONG HEI FATT CHOY! GONG XI FA CAI!!!

Monday, November 26, 2012

Recipes : Strawberry Pretzel Salad

We spent Thanksgiving with J's family up on the mountains, at his grandfather's house. I love it up there. They have no internet access, or cell phone reception so it feels like we're escaping from reality, getting away from civilization.

Instead, we spend our time playing board games, catching up with one another, cooking and preparing for the Thanksgiving dinner.

This year J and I are tasked with desserts, so he made a pecan pie, while I tried my hand at Strawberry Pretzel Salad. I don't know why they call it a salad, but it was pretty easy to make. I'll share the recipe with you today!


Via

For the crust / base, you need:

2 cups of crushed pretzels
3/4 cup melted butter
3 tbsp sugar


Preheat oven to 400 degrees F.
Melt the butter, add it to the crushed pretzels and sugar. Mix well.
Spread mixture into a 9 by 13 inch pan and bake for 7 minutes.
Set aside and allow to cool.


For the cream cheese layer you need:

1 8oz tub of whipped topping
1 8oz package cream cheese
3/4 cup sugar


In a mixing bowl, beat cream cheese with the sugar.
Fold in the whipped topping evenly into the mixture.
Spread over the cooled crust, making sure there are no holes in the layer of cream cheese mixture. (This is ensure the next layer of jello/ gelatin does not seep through, into the bottom crust layer)
Refrigerate until well chilled.


For the strawberry gelatin you need:

2 pack of 3oz strawberry gelatin dessert mix
2 10oz packs of frozen strawberries
1 8oz can of crushed pineapple
2 cups boiling water


While waiting for the frozen strawberries to thaw, bring water to a boil
Dissolve gelatin mix in the water.
Allow to cool slightly.
Add the strawberries and pineapple to mixture.
Pour over the cream cheese layer.
Refrigerate until it is time to serve!!


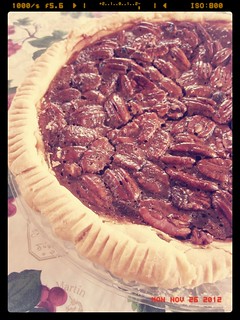
Unfortunately, I forgot to take a picture when I was done. But here's a picture of J's pecan pie. It's a pity I don't like pecans, so I couldn't tell you if his turned out great. But according to the family, our desserts were awesome, so yay!

IMG_7879


If you celebrate Thanksgiving, I hope you had a great one! Next up, Christmas!! Can't wait!


Monday, June 25, 2012

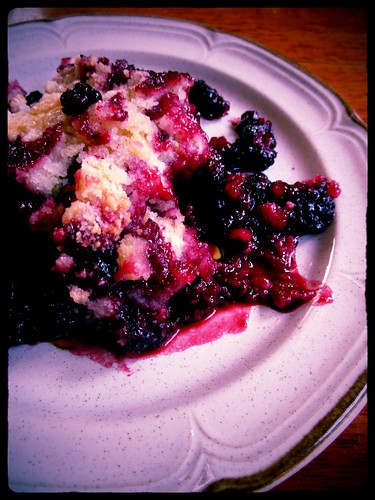
Favorite Things: Wild Berries Cobbler

IMG_6359

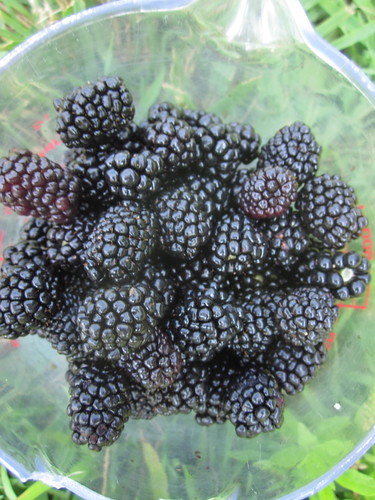
Now that it is summer, blackberries are growing in abundance in the wild! J and I took a stroll to the nearby park one day and decided to pick them to whip up a quick and easy blackberry cobbler for dessert! Only we forgot about those thorny bushes. Don't be too eager to jump in and start picking like we did! I got caught amongst those thorns and J had to untangle a very scratched-up me.


IMG_6353

Pick ones that look the darkest and plumpest!

We picked 4 cups of berries (yes, we brought a measuring cup just for that purpose!) and here is how to make your own fuss free cobbler for the weekend!


********


IMG_6358

You need:

4 cups blackberries
1 large egg
1 cup all-purpose flour
1 cup sugar (or more to taste)
6 tablespoons of melted butter
1 tablespoon lemon juice


Pre-heat oven to 375 deg F. Lightly grease an 8 inch baking dish, then place blackberries in dish. Sprinkle lemon juice over berries.

In a mixing bowl, add egg, flour and sugar and stir until it is the consistency of coarse meal.

Sprinkle mixture over berries, and then drizzle butter over the top.

Then it is ready for the oven! Bake in oven at 375 deg F for about 35 minutes, or until the topping is lightly browned and bubbly. Let it stand for 10 minutes.

Serve warm with whipped cream or ice cream!


Recipe from here

*********


It was perfect because the tartness of the berries balanced well with the sweet cobbler topping. It would have been divine if we had vanilla ice cream to accompany this dessert!

And I didn't have to work too hard for this one, well, except for the picking.

Enjoy!


Wednesday, December 28, 2011

The Story behind the Chocolate-Cake-Recipe-for-Dummies.

IMG_4382

Tried and tested. And true.

VERY SIMPLE!


So the story begins like this.

Last month, I was home in Singapore for my mother's birthday. I decided I wanted to do something special this year. Instead of getting her a present, I was going to do the un-thinkable -- bake her a cake!

Now, if you know me, or have read my past cooking entries, you know that I dread cooking. I like to eat, don't get me wrong, but I like to have food appear magically in front of me, piping hot and ready for chow. In return, I am most willing to do the clean up, however big the mess in the kitchen. And if you've seen the J-man cook, you'll know I REALLY am game to clean up.

So back to the story. I embarked on this lofty grand plan of baking a cake, but i really wanted the simplest possible recipe. I consulted my long-time food provider P (ie my ex-housemate), i researched the internet and finally settled on this Chocolate Cake recipe. Chocolate. Everybody likes chocolate right? Sure-win formula!

Then came the NEXT obstacle. I have not stepped into her kitchen for years. I had no clue what ingredients or equipment I needed. So i had to concoct a story. I was also going to attend my friend's wedding at about the same time as my mother's birthday. So i told my mother that I was charged with baking a cake for the bridal party. It never crossed my mind she would find it strange why they would ask a non-baker to do that, instead of just buying one.

In any case, she bought the story.

So she got out all her baking equipment, we went out shopping for the ingredients, and she even watched me while I baked!

That night, she invited our extended family over for a family reunion dinner because I haven't seen my aunts, uncles and cousins for a long time. While she was busy preparing a feast, i roped everyone in on the surprise. When dinner was over, everyone gathered in the living room while my mother was busy washing up (that woman never stops for a minute!) My uncle called out to her and told her to stop for a moment to chat. Meanwhile, I hid in my room, cake in hand, candles waiting to be lit.

When she walked out, we dimmed the lights and brought the cake to her!

She stood in front of the cake, surprised but beaming as we sang her the birthday song. When the song was done, we told her to make a wish before she blew out the candles. She closed her eyes, but after a second or two, burst into tears. Actually she bawled rather loudly, and frightened my baby niece in the process.

It was a few minutes of extreme awkwardness for everyone; and for me, it was the hardest thing to see. I tried to give her a hug but had to walk away because I was about to burst into tears myself. It was supposed to be a joyous celebration! I knew in my heart what her birthday wish was -- for me to come home. It didn't help I was leaving in 2 days.

I'm still tearing as i write this :(

But, long story short. This is a really simple recipe! If i can do it, so can you! Thank god for cake mixers! I know it's not the most complicated, mind-blowing, delicious cake, but for me, it's a leap from Betty Crocker's Pre-mix brownies. Although I did use powdered sugar instead of castor sugar at one point.

The picture above was my second attempt at the recipe. Much. Better.


Tuesday, February 1, 2011

A tart in the making

Because I can never be half arsed to make myself a meal, much less dessert, so it really spoke volumes when I decided to make my own pineapple tarts from scratch.

I called my parents over the weekend and they were in the midst of baking pineapple tarts (as usual) for the coming Chinese New Year. When I hung up, i felt a sudden wave of homesickness wash over me. It's strange because I have been away from home 6 years now, and i've never really felt the impact of it (save my first year). J says it's largely due to not even having close friends here with me. In the past, at least my boss would invite us to her place for a reunion dinner and some 'lou hei' affair.

I began to think about all the Chinese New Year goodies I'm missing... pineapple tarts, kueh bangkit, bak kwa... and was super listless by bedtime. The J-man saw how sad I looked and (bless his heart) searched for bak kwa online.

He said, "how can i make it any better for you, dear?"

We found on online store Bak Kwa King based in Oakland, CA and placed an order for 2 pounds of bak kwa. Not a lot, but just enough to cheer me up a little. And then i decided that i was going to bake myself some pineapple tarts. It really can't be that difficult, as long as i had a recipe!

When i was young, i remember helping my mother out in the kitchen, stirring the bubbling pot of pineapple pulp for eternity, while i watched her churn out batch after batch of tarts single-handedly.

I found a recipe off Wall Street Journal (??) and decided to use it only because the writer is from Singapore, and surely, that recipe will be closest to home. I did ask my mom for her recipe too, but knowing how busy my family will be, preparing for CNY, i decided to go ahead and try it out on my own first.
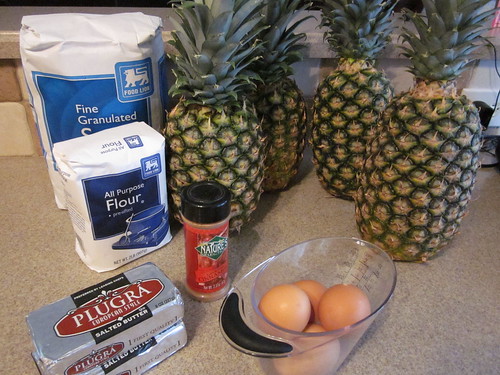
IMG_0371

The recipe calls for ingredients that would yield 100 tarts, and for the life of me, I don't know why i didn't half the recipe to try it on a smaller scale. I was ambitious, and thought that since I was already making them, I might as well make more to satisfy my cravings.

Alas.

My first challenge came in the form of chopping up FOUR huge pineapples. My dad used to slice and dice all our fruits, what do I know of chopping up pineapples??? Fortunately, the pineapples came with a tag that gave instructions on how to chop it, even though it did take me a good half an hour to get all four pineapples diced up. I thought to myself, if i DID give up here, at least i'd learnt how to cut up pineapples today.

And then the instructions said to run the chunks through a juicer, to obtain the juice and pulp separately. We have no juicer! Great! i had thought our food processor will do the trick, but it mushed the pineapple to a complete puree that it was not really possible to separate anything from anything. Resigned, I took out a strainer and did it by hand. What was left of the pulp i placed in a pot to prepare for the 3 gruelling hours of slow boiling and stirring.

While that was going on, I decided to be smart and start on the pastry (or i'll never be done by the end of the day). That was easy enough. Years and years of making playdough in school gave me the experience i needed. Even when the recipe said only a certain amount of flour was needed, i knew i had to add more because the dough was too sticky (*double pats on the back*) Making the dough was the easiest and most pleasant part of the process. The dough smelt like cookie dough and was a refreshing change from all that pineapple wafting into my nose.

And then i realised we do not have cookie cutters in the house. J and I brainstormed the different ways we could stuff the pineapple into the pastry and agreed on one method. i used the lid from my water bottle to cut out circles and folded in the edges all round to make a little depression in the middle. J used a knife to draw in stripey patterns all around the edge, but i WASN'T about to do that to 99 more tarts. No sireee! Well, the rolling, and the cutting, and the folding, took another three taxing hours. All this done while stirring the pineapple constantly, to make sure it doesn't burn.

Eventually the pineapple got done cooking (with all the juice evaporated) i rolled them into tiny little balls with my hands. I placed each one in the middle of my coarse looking excuse for a pineapple tart and set them in the oven to bake.

I started at about 2pm in the afternoon, took a break in the middle to have dinner. And i only finished baking, cleaning and washing up at around 1030pm. At the end of it, I was tired, grouchy and had a lousy output of only 70+ tarts. BUT it was a rewarding experience, and I will savour my tarts, and any future tarts I make/eat with relish, knowing how much work goes into each and every one of it.

Happy Chinese New Year y'all! Have a wonderful year of the rabbit!
IMG_0396
Related Posts Plugin for WordPress, Blogger...